Security
JWT
You can find the jwt configuration in appsettings.json
"Security": {
      "Authentication": {
        "Jwt": {
          "Base64Secret": "bXktc2VjcmV0LWtleS13aGljaC1zaG91bGQtYmUtY2hhbmdlZC1pbi1wcm9kdWN0aW9uLWFuZC1iZS1iYXNlNjQtZW5jb2RlZAo=",
          "TokenValidityInSeconds": 86400,
          "TokenValidityInSecondsForRememberMe": 2592000
        }
      }
    },
Enforce HTTPS
You can enforce HTTPS by setting "EnforceHttps": true in appsettings.Development.json or appsettings.Production.json.
"Security": {
    "EnforceHttps":  true
},
For more details, please see Enforce HTTPS in ASP.NET Core
OAuth2 and OpenID Connect
OAuth is a stateful security mechanism, like HTTP Session. Spring Security provides excellent OAuth 2.0 and OIDC support, and this is leveraged by JHipster. If you’re not sure what OAuth and OpenID Connect (OIDC) are, please see What the Heck is OAuth?
Keycloak
Keycloak is the default OpenID Connect server configured with JHipster.
To log into your application, you’ll need to have Keycloak up and running. The JHipster Team has created a Docker container for you that has the default users and roles. Start Keycloak using the following command.
docker compose -f ./docker/keycloak.yml up
The security settings in appsettings.json are configured for this image.
appsettings.json:
  ...
  "Security": {
    "Authentication": {
      "OAuth2": {
        "Provider": {
          "IssuerUri": "http://localhost:9080/realms/jhipster",
          "LogOutUri": "http://localhost:9080/realms/jhipster/protocol/openid-connect/logout",
          "ClientId": "web_app",
          "ClientSecret": "web_app"
        }
Keycloak uses an embedded H2 database by default, so you will lose the created users if you restart your Docker container. To keep your data, please read the Keycloak Docker documentation. One solution, with keeping the H2 database, is to do the following:
Add a volume that will be persisted:
./keycloak-db:/opt/jboss/keycloak/standalone/dataChange the migration strategy from
OVERWRITE_EXISTING, toIGNORE_EXISTING(in the command section)
In production, it is required by Keycloak that you use HTTPS. There are several ways to achieve this, including using a reverse proxy or load balancer that will manage HTTPS. We recommend that you read the Keycloak HTTPS documentation to learn more about this topic.
Okta
If you’d like to use Okta instead of Keycloak, you’ll need to change a few things. First, you’ll need to create a free developer account at https://developer.okta.com/signup/. After doing so, you’ll get your own Okta domain, that has a name like https://dev-123456.okta.com.
Modify appsettings.json to use your Okta settings. Hint: replace {yourOktaDomain} with your org’s name (e.g., dev-123456.okta.com).
appsettings.json:
  ...
  "Security": {
    "Authentication": {
      "OAuth2": {
        "Provider": {
          "IssuerUri": "https://{yourOktaDomain}/oauth2/default",
          "LogOutUri": "https://{yourOktaDomain}/oauth2/default/v1/logout",
          "ClientId": "client_id",
          "ClientSecret": "client_secret"
        }
Create an OIDC App in Okta to get a {client-id} and {client-secret}. To do this, log in to your Okta Developer account and navigate to Applications > Add Application. Click Web and click the Next button. Give the app a name you’ll remember, and specify http://localhost:[port]/login/oauth2/code/oidc as a Login redirect URI. Click Done, then edit your app to add http://localhost:[port] as a Logout redirect URI. Copy the client ID and secret into your application.yml file.
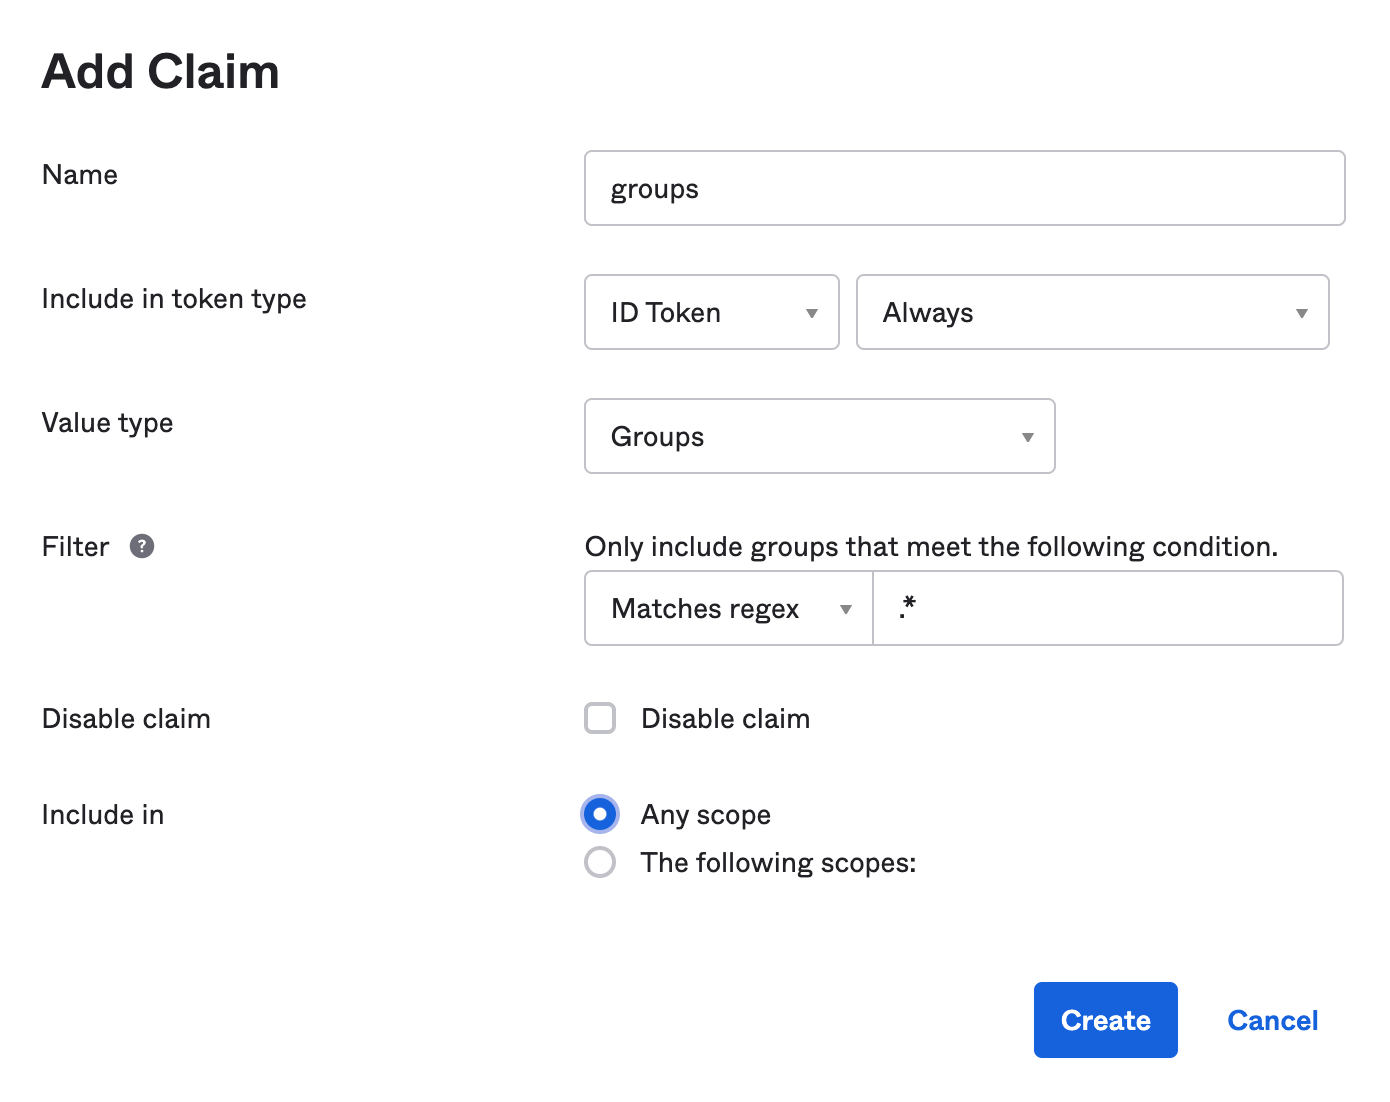
Create a ROLE_ADMIN and ROLE_USER group (Users > Groups > Add Group) and add users to them. You can use the account you signed up with, or create a new user (Users > Add Person). Navigate to API > Authorization Servers, and click on the default server. Click the Claims tab and Add Claim. Name it groups, and include it in the ID Token. Set the value type to Groups and set the filter to be a Regex of .*. Click Create.